Introduction
In late 2004, I became aware of the use of Teflon tape pompoms as a nearly permanent alternative to standard ejection wadding. One attaches the pompom to the shock cord below the parachute, stuffing it into the BT just as if it was wadding. Surprisingly, the short-duration heat/flames of the ejection charge do not damage the pompom, allowing it to be used many times.
However, construction of a pompom can be tedious. It appears that there are two methods in use:
One is to pre-cut a number, say 35, of Teflon tape strips (plumber’s tape), lay them out in a starburst pattern, keep them well-powdered with talc or baby power to prevent sticking, and tie them with a bit of Kevlar thread in the middle. I found this method less than optimal because cutting the individual strips is tedious, the strips tend to easily tangle, and the powdering process is messy.
Another method is to use the target rocket’s body tube as a jig. You wrap the tape around the BT a number of times (35), keeping them well-powdered. Then you slide the bundle off, tie it on one side and cut through the other side. This method also has its drawbacks. It too is messy, and its easy to get he wraps too tight, making it very difficult to slide off the tube. Also, cutting the bundle in one pass applies pressure to the tape, making the cut ends stick together. And finally, the length of the strands seems shorter than desirable.
So I put together the following device, drawing from similar techniques for making blackmatch.
What I built
I wanted a method to quickly make a pompom without the inherent messiness of the above approaches.
My solution:
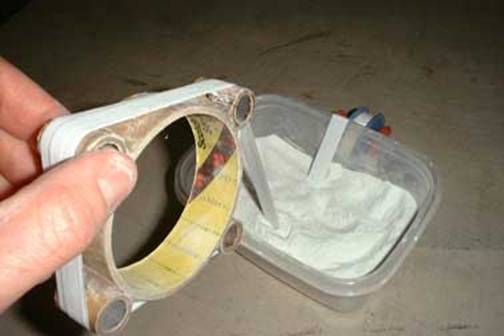
A powder-coating basin with attached tape dispenser used in conjunction with a winder designed for ease of tying and cutting the pompom once wound.
Constructing the Pompom Maker
Parts List
· 1 cheap food-storage box (about 6” L x 4” D x 2½” H)
· 2 stiff rods (wood ,steel, plastic) – about the length of the box
· 1 empty 1” masking tape roll
· 2 expended 18mm engine casings
· 6-8” thick stiff wire (about 3/16” diameter including insulation)
· 2” plastic tubing, sized to fit over above wire
Tools and supplies you may need
· hot glue gun
· wood or hack saw (depending on choice of rod material)
· talc or baby powder
· 520” roll of ½” Teflon plumber’s tape
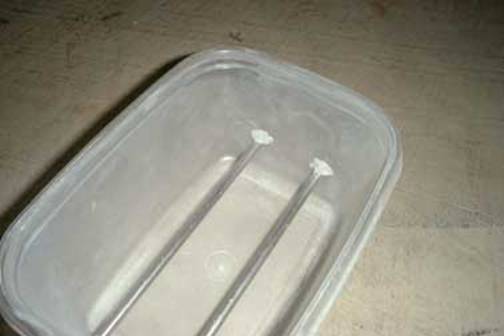
STEP 1 – Powder Box
Cut the rods so that they fit snugly lengthwise into the food box, about ¾” from the bottom. Hot glue them into place, about 2” apart.
STEP 2 - Roll Hanger
Bend the thick wire (here, red) into a holder for the Teflon tape roll.
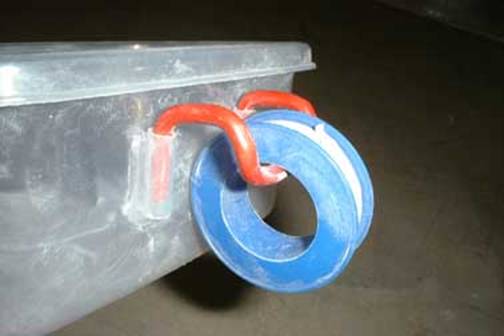
STEP 3 – Hanger Mount
Cut two ~1” long pieces of the plastic tube and mount them (hot glue) on the long side of the food box to hold the tape hanger. Position them so that the roll doesn’t hang below the bottom of the box, but so that you can pull remove the hanger to change rolls.

STEP 4 - Roller
Cut four 1” pieces of expending 18mm engine casing and hot glue them to the used masking tape roll.
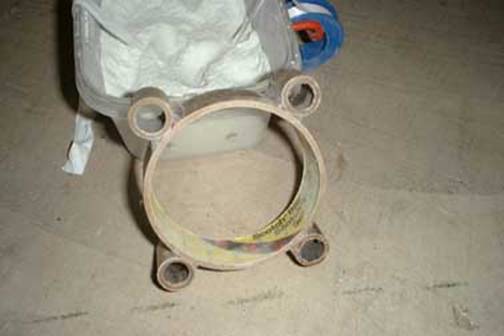
Note that the engine casings should be positioned so that (according to the photo above) the right edges of the masking tape roll and the right edges of the right-hand engine casings are collinear. The same for the left side. This means that when wrapping the tape onto the roller, there will be a gap between the tape and the top and bottom of the masking tape roll, making it easier to tie and cut.
Using
the Pompom Maker
1) Fill the powder box with talc or baby powder
2) Place a 520” roll of Teflon tape on the hanger and insert the hanger into the mounts on the side of the powder box
3) Feed the end of the Teflon tape under the two rods
4) Wind the (entire roll of) Teflon tape onto the masking tape roll by rotating it
5) Tie the Teflon loops with Kevlar thread (this thread will be used to secure the pompom to the rocket/recovery apparatus)
6) Cut the Teflon loops on the side opposite the Kevlar tie. I prefer to use an X-acto razor saw because this method does not press the loops together and cause them to stick together

7) Place the completed pompom in the powder box; replace the lid, and shake to thoroughly coat the pompom with powder
8) Attached the pompom to your rocket